Uploading, Organizing, and Categorizing in the Image Bank
With Imageshop, you’ll quickly gain full control over your files. Here we’ll show you how to upload and organize images to get the most out of your image bank.
How to Upload Efficiently
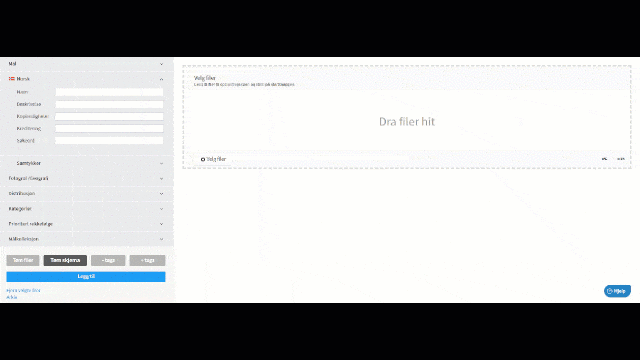
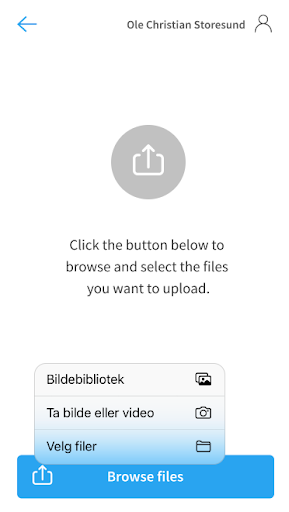
You can upload images or other files using drag and drop or via “select files.” You decide whether you want to upload individual files or entire folders. You can also upload directly into albums if you have the album module. It’s also possible to upload and categorize large batches of files to streamline the process.
Dreading the clean-up of images and files at the start? Imageshop can help you import all existing material in an efficient way. Vitus Reiser was dreading sorting through thousands of images. Luckily, the drag-and-drop function saved the day:
“I could take 20–30 images at a time, as long as they were going into the same category. It still turned out very structured when I was finished,” says Veronica from Vitus Reiser. You can read more about how Vitus got their images organized here.
You can also tag and upload images via mobile. This is handy for you or your colleagues who want to save images on the go. You don’t need to transfer files to your computer before uploading them to the image bank.
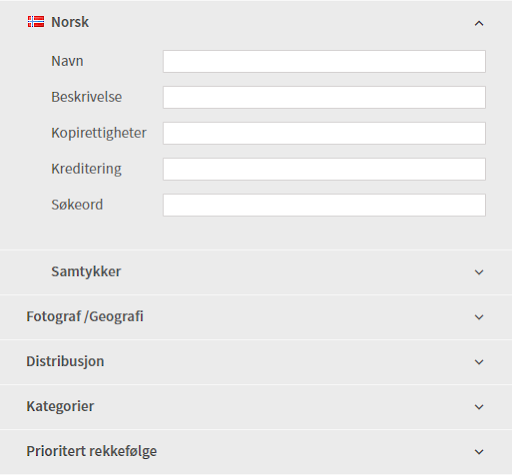
Add Information and Categories to Multiple Images
Planning to upload images and files in bulk? Sorting becomes much more efficient if you group files that share similar information. You can enter information and categories for several images at once.
Uploading files with nearly identical details to those you just uploaded? The information you just entered will be saved in the form, so you only need to make small adjustments to the next group of images—saving time.
Multiple images can also have the same name. Each image is assigned a unique code when uploaded, making it easy to tell them apart later. This is especially helpful when uploading large numbers of images at once.
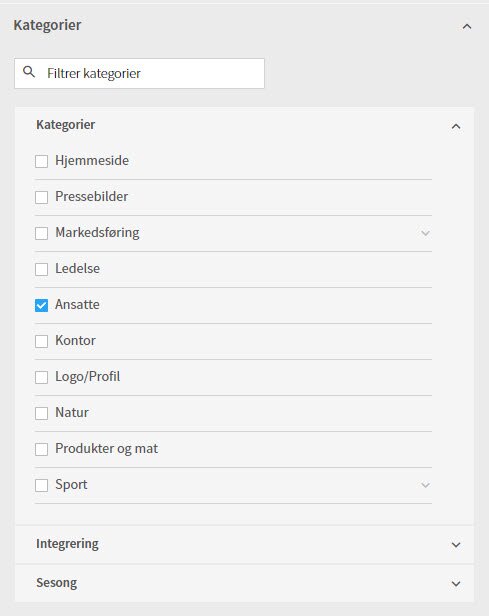
Categorization and Keywords for Finding Files
The image bank allows categorization using predefined categories and subcategories. You can also place images in multiple categories at the same time.
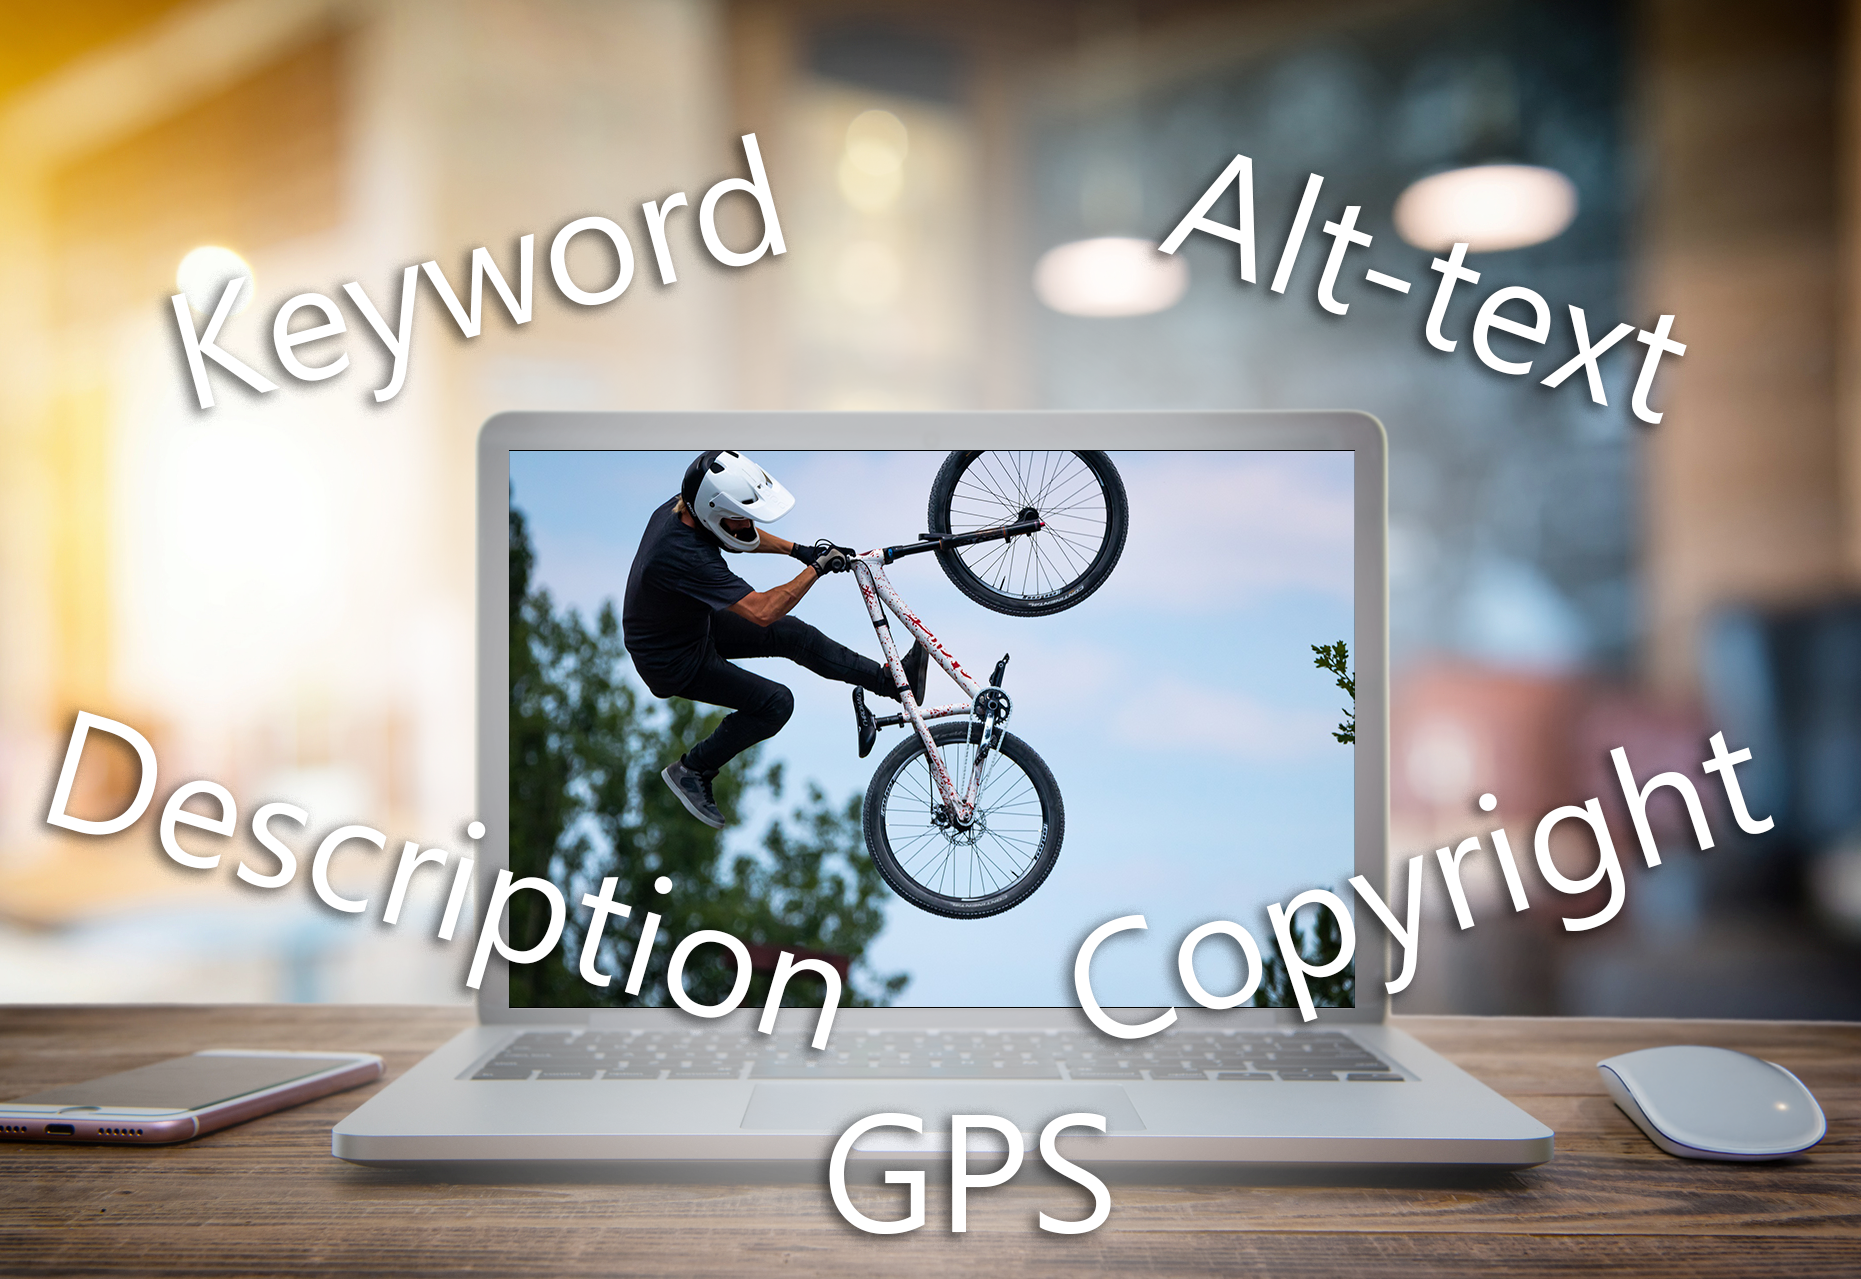
It’s important to fill in keywords, names, descriptions, and usage rights to make content easy to find later. The more you fill in, the easier it is to retrieve images in the future.
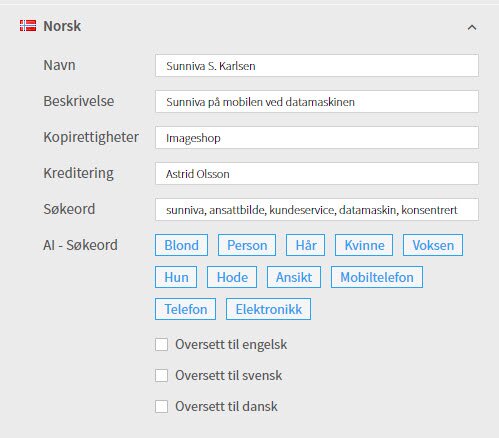
Keep in mind that others will also be searching for these files. So, use intuitive keywords that make it easy for others to locate what they need. Create clear guidelines for how to name, describe, and tag images—especially if several people are uploading files to the image bank.
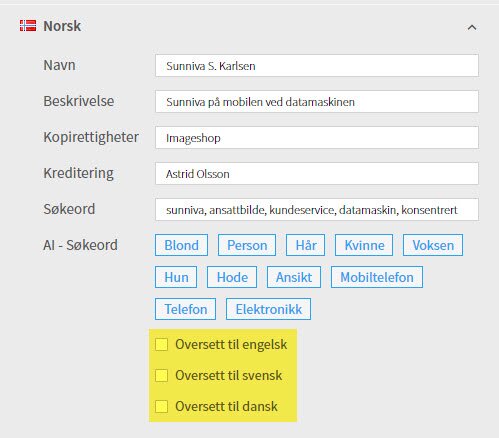
You can enable automatic translation if your company uses multiple languages. This saves you a lot of work. One language is included in a standard agreement, but you can add more. Imageshop is already available in Norwegian (Bokmål + Nynorsk), English, Spanish, German, Chinese, Danish, and Swedish.
You can set up default copyright entries using your company name. You can still change this if you upload images for which you don’t hold the rights. Credits can also be auto-filled when selecting a photographer.
Full Control of Rights and Consent for Image Use
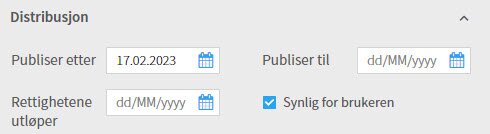
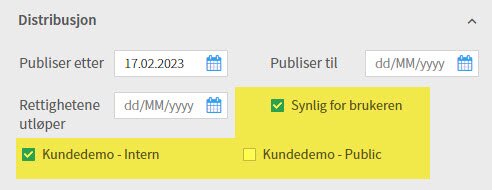
You can add the time period during which you have the right to use the material. You can also choose which interface the image will be visible in—either for everyone or only selected users. After the “published until” date expires, the image will only be visible to administrators. A week before the rights expire, the Administrator receives an email reminder to take action if access is still needed. This way, you always have full control over rights and consent.
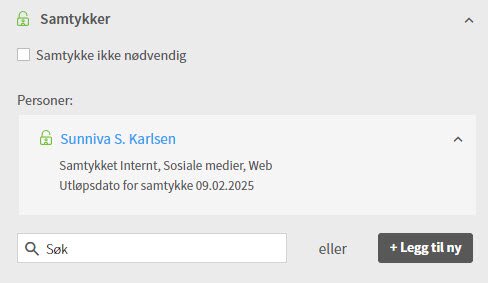
If you have the consent module, you can tick a box and add a reason why the image can be exempted from consent. You can also tag images with people who need to provide consent, and add new individuals directly in the upload form.
Want to learn more about how the image bank helps you manage privacy and consent? Read more about the consent module here!
Custom Fields – Great for Online Stores
Need to add more information beyond the predefined fields? Then you can use custom fields. For example, you can use them to add product numbers to images—something that’s incredibly useful if you run an online store.
You’ll then be able to search for the product number and find all the images tied to that product. That’s much easier than clicking through folders organized by product category.
Add Photographer and GPS
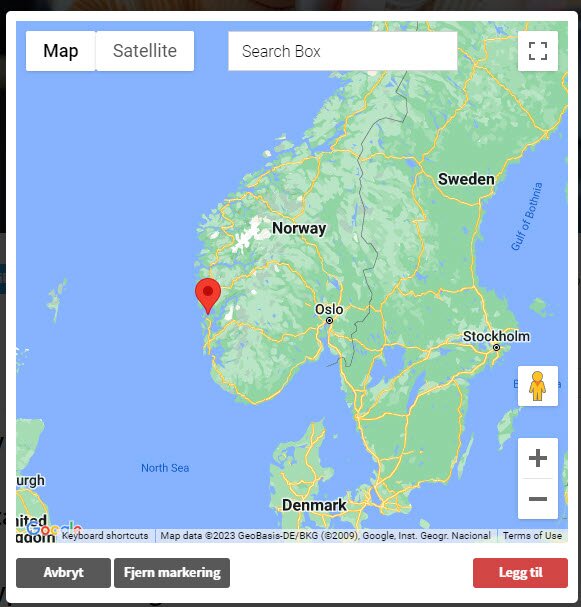
You can include GPS coordinates if needed. If coordinates are already embedded in the metadata when the file is uploaded, there’s nothing more you need to do. Otherwise, you can add them manually by clicking “GPS” and selecting the location on the map.
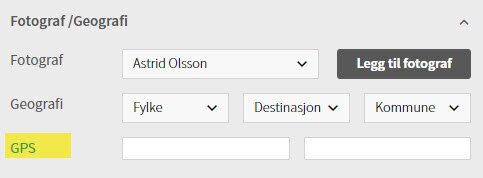
You can also add geographic information like counties, municipalities, or specific destinations. This is especially useful if you work in tourism or have physical locations throughout Norway.
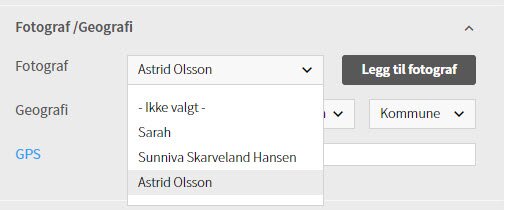
You can also create a list of photographers in Imageshop. That way, you can select the correct photographer when uploading images. If the photographer isn’t already in the system, you can easily add a new one in the upload form.
Access Levels for Internal and External Use
When uploading files, you can control who will have access to them in the upload form. For example, maybe your company has a permission level for materials meant only for employees? Or maybe the images should be accessible to both internal and external users? You can choose that here!
File Priority Order
By default, the most recently uploaded images appear at the top of the image bank. As new files are added, older ones are pushed further down. If you prefer to set a specific priority order, you can choose which files should be most visible. This is done by ranking them (from 1–20, with 20 being the highest) and deprioritizing others (-1 to -20, with -20 being the lowest).

This helps prevent old archive images from taking up too much attention in the image bank.
Save Time in the Long Run
You can always go back and change categories and tags for one or more images in Imageshop. Still, we recommend doing a thorough job when you first upload your files. That way, you save a lot of work later. It’s also smart to create a clear routine for uploading so you consistently add the information that makes the image bank user-friendly.
Once a year—spring is a good time—it can be useful to do a clean-up: tag, remove duplicates and old files, and tidy things up. That way, the image bank stays relevant and useful for users.
Find tips for spring-cleaning your image bank here!
Need help getting started?
Contact post@imageshop.org and we’ll help if you’re unsure about anything.
Don’t have Imageshop yet? Imageshop is a flexible image sharing service that goes the extra mile to offer tailored solutions. Do you need to upload and categorize images and files in a simple and user-friendly way?